Triage to remediation
The report is not the end of the workflow. It is the starting point for deciding what is real, what matters, who owns the fix, and what evidence should be preserved.
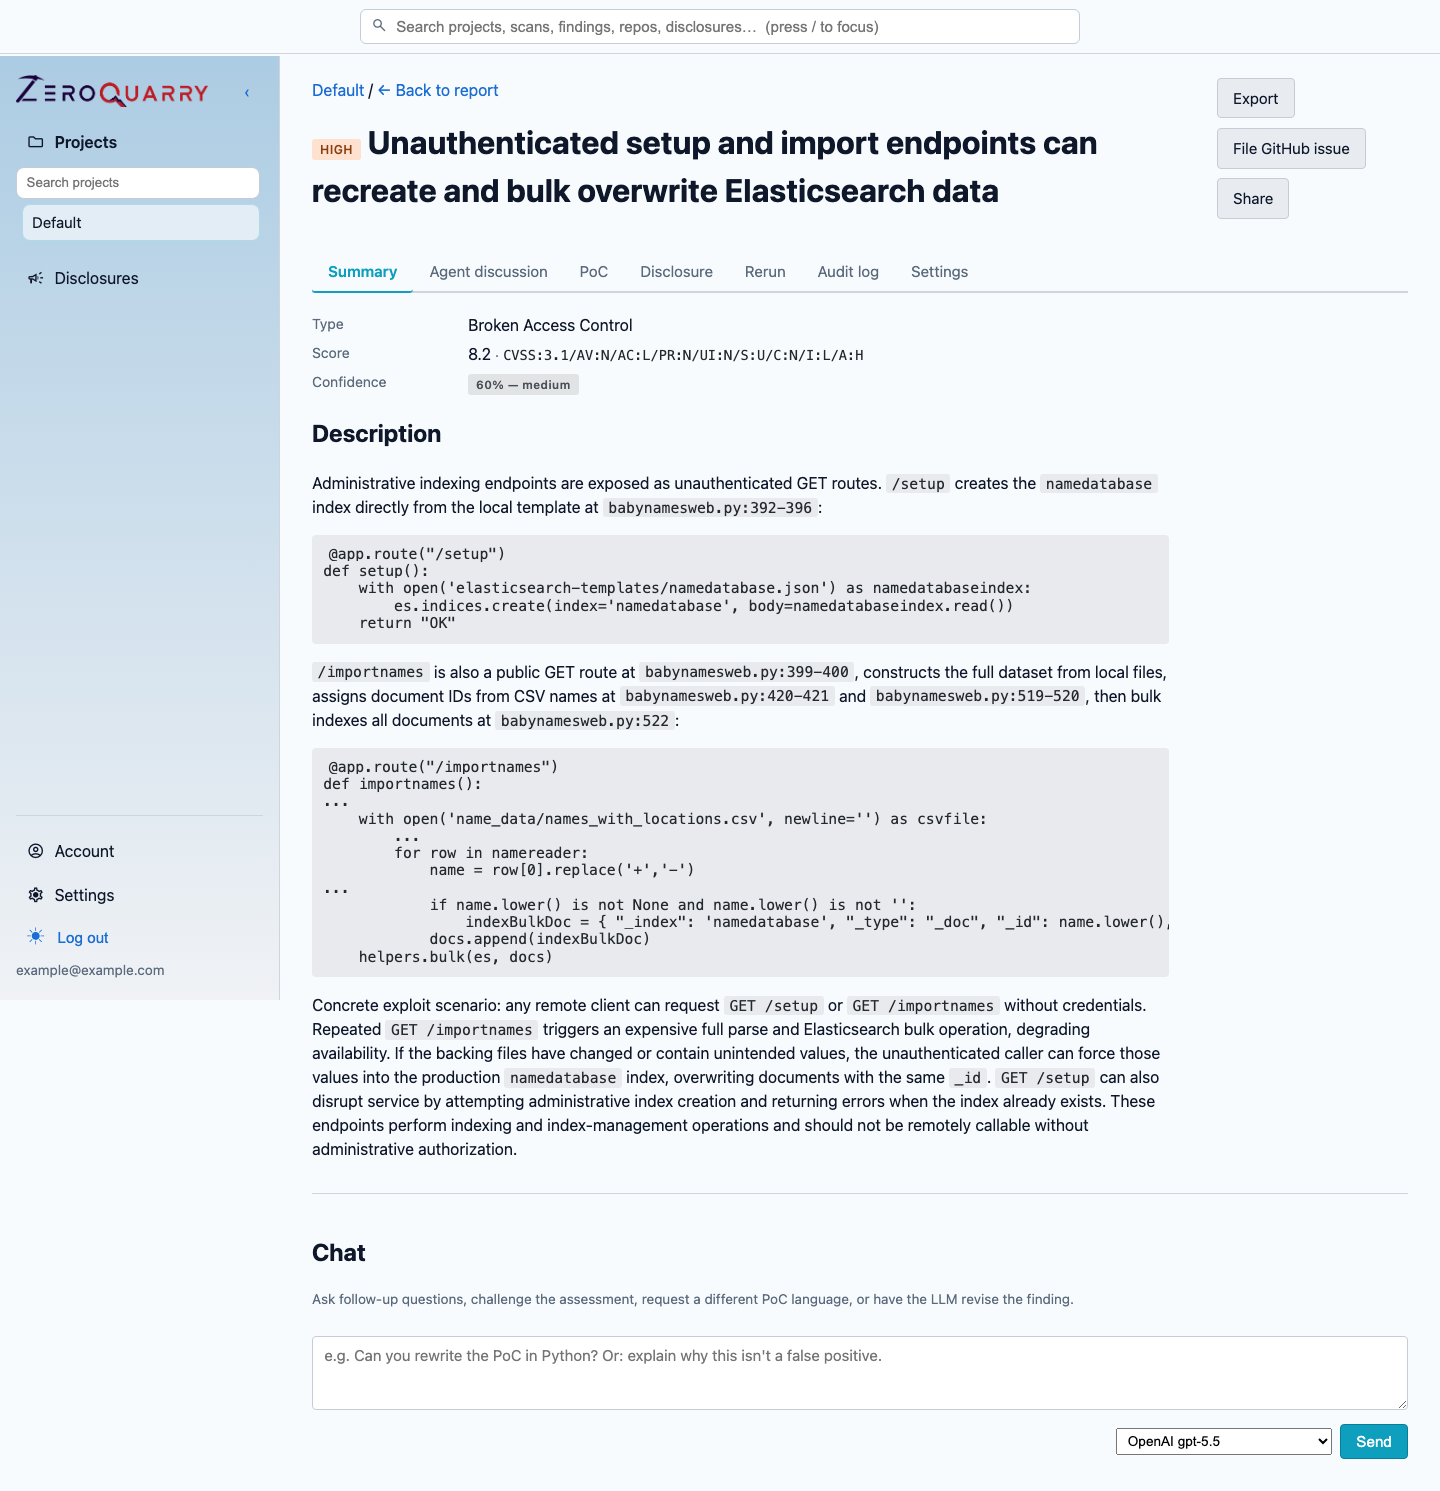
Triage usually happens at the finding-detail level, where the evidence, confidence, exports, chat, and remediation helpers are all visible together.
Use this playbook after any completed scan with findings.
Triage goals
Triage should produce four decisions for each important finding:
- Is the finding real enough to act on?
- How severe is the impact in this product?
- Who should fix or accept the risk?
- What evidence belongs in the ticket, export, or disclosure?
ZeroQuarry provides severity, confidence, PoCs, vendor review, chat, exports, and patch generation to support those decisions.
Step 1: Start from severity, then check confidence
Open the report and sort by severity. For each critical or high finding, look at confidence before assigning work.
High severity and high confidence usually means "fix now." High severity and low confidence means "validate now." Low severity and high confidence may still matter if the affected component is regulated, externally exposed, or commonly chained with other issues.
Read next: Findings and Confidence and review.
Step 2: Read evidence before the conclusion
For each candidate finding, inspect:
- affected source path, URL, artifact path, or endpoint
- reproduction steps or PoC
- assumptions about authentication and roles
- CVSS vector and severity rationale
- any related non-issues
- vendor verdict and rebuttal, if present
When evidence is thin, ask finding chat targeted questions:
What exact authorization check is missing, and what role boundary does it cross?
Give me the shortest reproduction path an engineer could use in staging.
What would make this a false positive?
Step 3: Challenge important findings
Use adversarial vendor review for findings that will be expensive, controversial, or shared outside the security team. The vendor reviewer tries to reject weak claims; the researcher rebuttal either restores confidence with evidence or lets the finding stand as challenged.
Do not treat a rejected vendor verdict as automatic deletion. Treat it as a signal to read the evidence and decide whether the product context changes the answer.
Step 4: Generate or request remediation help
When the finding comes from source code and the scan still has source available, use patch generation if your tier includes it. A patch is a starting point, not a merge-ready guarantee.
Review generated patches for:
- whether they preserve expected behavior
- whether the fix covers every affected path
- whether new validation is too narrow or too broad
- whether tests should be added around the vulnerable flow
If the first patch is close but not quite right, use feedback to generate a new revision.
Step 5: Hand off the right artifact
Different audiences need different outputs:
| Audience | Best artifact |
|---|---|
| Engineer | Finding export with source, impact, PoC, and patch link |
| Security lead | Report export filtered by confidence and severity |
| Product owner | Summary, affected feature, customer impact, timeline |
| External vendor | Disclosure draft plus manually reviewed PoC |
| Auditor | Report export including targets and non-issues |
Read next: Exports and disclosures.
Step 6: Re-run and compare
After remediation, re-run the scan in the same project and lineage. For a source scan, use a focused note:
Validate the fix for the organization role escalation finding. Re-check related
invite acceptance, session creation, and project membership paths.
Use finding fingerprints and report history to confirm whether the issue disappeared, changed shape, or moved to a related path.